On the previously of article (How To Configure VLAN on Mikrotik ), I’m have explained about how to configure vlan and on this article I’ll to explain vlan tag stacking. Tag stacking that are method used for makes or running vlan in another vlan (vlan tag package above vlan tag before regardless type of vlan tag).
On vlan tag stacking, bridge interface doesn’t to checking whether those package tagged or untagged.
If assumed thats all package which received by specific port will became untagged and then their will be make of a new vlan tag regardless they have vlan tag or not.
As the simply case is running vlan interface above of another vlan interface where the vlan will be do package encapsulation becoming a new vlan.
The Advantage on tag stacking contained on limitation of vlan tag.
If on regular vlan maximum vlan tag is 4096 then you got more than vlan tag with use tag stacking on vlan (can be 4096*4096).
The folowing is a topologi that will use on this tutorial.
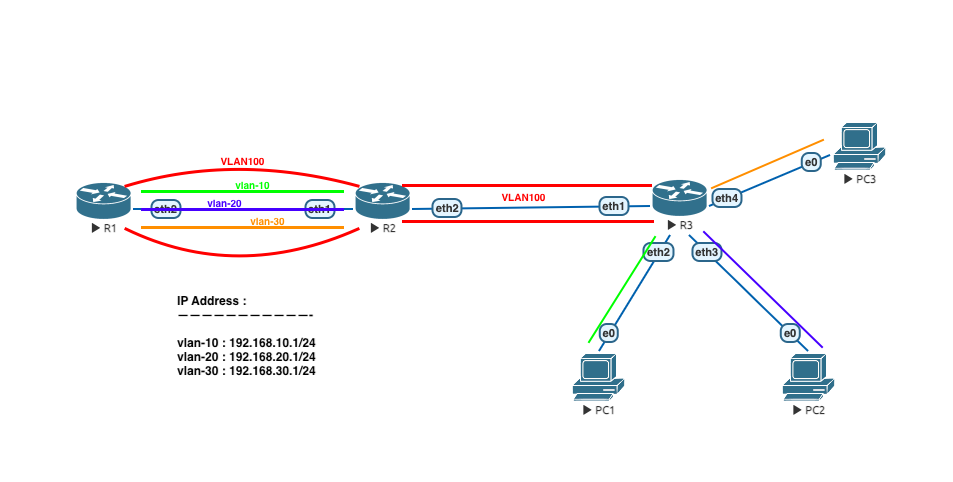
On the topologi R1 have create vlan100 in ether2 and then create again vlan 10,20,30 in vlan100. R2 as the router that are do the distribute vlan and activated vlan tag stacking to interface which of leads to R3 . and then R3 to do distribute untag vlan to pc client.
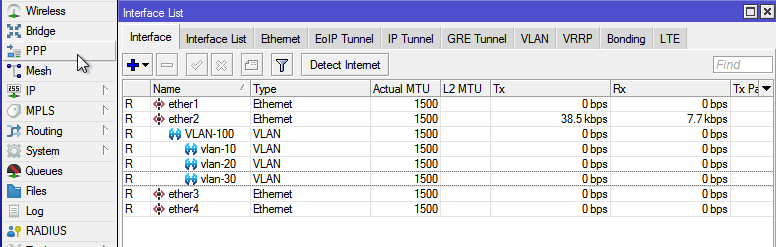
CONFIGURATION ON R1 :
Create vlan100 with interface ether2 and then vlan10,20,30 with interface vlan100 :
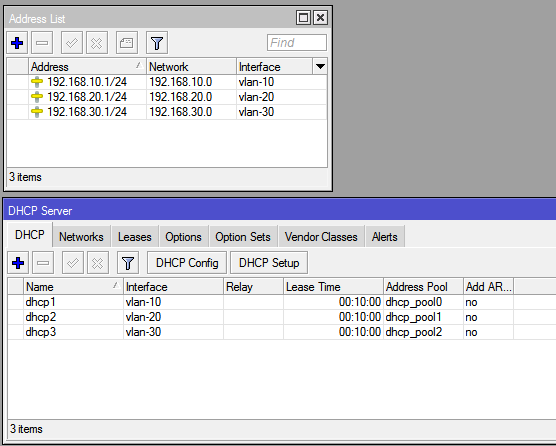
Do configuration ip address for each vlan interface and then setup dhcp for testing client using dhcp.
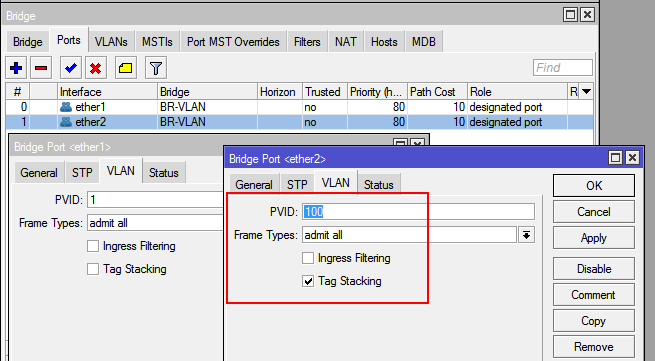
CONFIGURATION R2 :
Add new interface bridge named BR-VLAN in R2,and then put in ether1 and ether2 to bridge port. Note on ether2 you must konfigure PVID and tag stacking.
Move to VLANs tab and add configuration vlan100 for decided interface for tagged and untagged as showed in the image bellow.

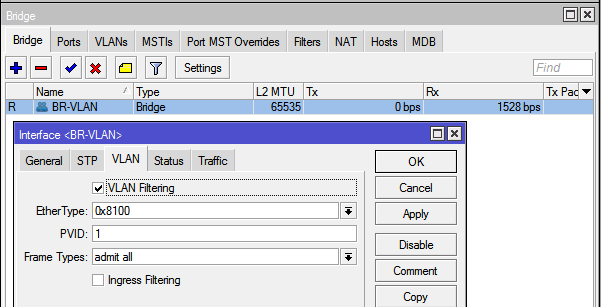
If you have do all configuration on R2, the last config you can enable vlan filtering on inteface bridge R2.
CONFIGURATION R3 :
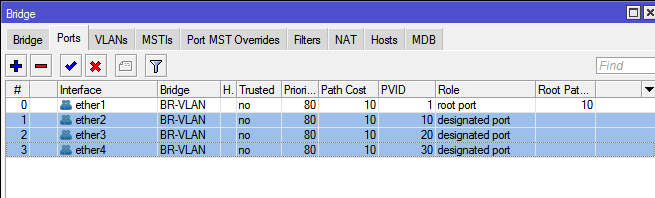
Same as R2, on R3 create bridge interface named BR-VLAN, and then put in interface ether1-4 in bridge port. Note on each ether(2-4) have a different vlan id, so you must setup PVID for each ethernet as showed image bellow.
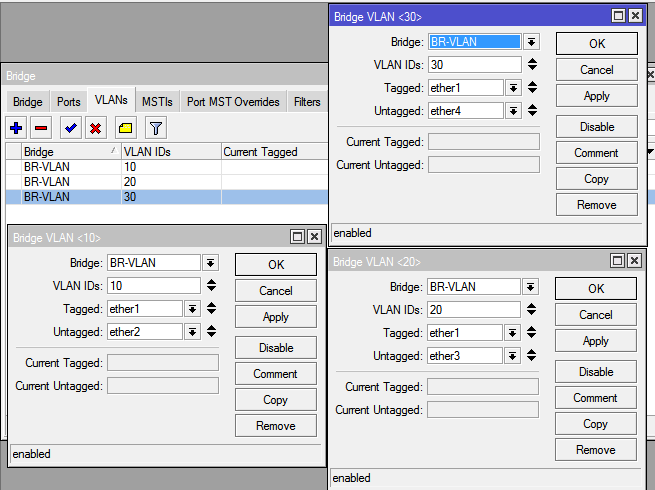
Move to VLANs tab, and then configure tagged and untagged port for each VLAN as showed in image bellow.
TESTING :
Running ip dhcp from PC1 :
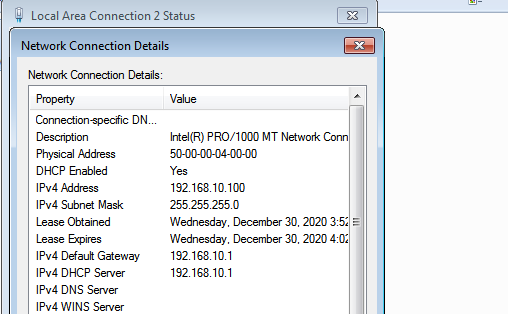
Running ip dhcp from PC2 : 
Test Running ip dchp from PC3 :
As showed in image above All configuration has ben successfully. Let’s Try Good Luck
Source reference :
https://mikrotik.id/artikel_lihat.php?id=418
https://wiki.mikrotik.com/wiki/Manual:Bridge_VLAN_Table